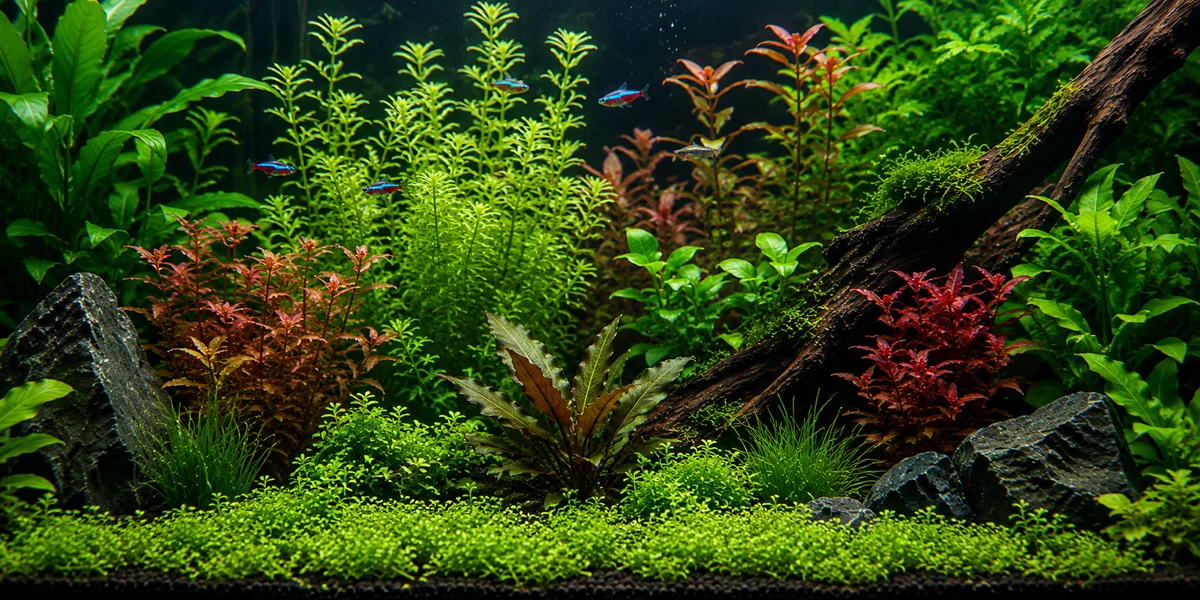
Before you start: decide what kind of tank this is
Most failed first tanks fail on paper before a drop of water is involved. The setup itself is not hard; what trips people up is mixing two different recipes. A low-tech tank runs on light and liquid fertiliser alone, with slow, forgiving plants. A high-tech tank adds pressurised CO2 and brighter light, grows almost anything, and punishes mistakes faster. Both are legitimate. Pick one now, because it changes what you buy.
If this is your first tank, we strongly suggest starting low-tech or adding CO2 a few months in, once the basics feel boring. Our complete low-tech guide covers that path in depth, and our beginner CO2 guide explains what injection actually changes when you are ready for it. Everything in this setup guide works for either route.
Write down three things before you shop: the tank size, the style you like (a jungle of stems, a calm island of wood and rock, a green carpet), and two or three plant families you want. Every later decision gets easier with those answers fixed.
Step 1: Choose your tank size
For a first planted tank, the sweet spot is 10 to 25 gallons (roughly 40-95 litres). Smaller sounds easier and cheaper, but tiny volumes swing in temperature and chemistry every time you top up or overfeed, and there is no room for planting mistakes. Very large tanks are stable but expensive to light, plant and re-scape when (not if) you want to redo your first layout.
| Tank size | How it behaves | Good to know |
|---|---|---|
| 5 gallons | Workable for a single small aquascape, but unforgiving | Parameters move fast; plant and livestock choices are very limited |
| 10 gallons | A genuine starter tank | Cheap to light and plant; still rewards careful stocking |
| 20 gallons (long) | The beginner sweet spot | Long, low footprint gives plants light and fish swimming room; very stable for its price |
| 25-29 gallons | Room to learn scaping properly | Taller water needs a stronger light to reach the substrate |
Length matters more than height. Plants are lit from above, so a long, shallow tank gets more usable light to the substrate than a tall one of the same volume, and carpeting plants will thank you. Whatever size you choose, buy the light to fit the tank's length, not a generic "plant light" with no stated dimensions.
Step 2: Pick a stand and a spot it can live in
Water weighs about 8.3 pounds per gallon (1 kg per litre) before you add glass, substrate and rock, so a filled 20-gallon tank easily passes 100 kg (220 lb). Use a proper aquarium stand or furniture you would trust two adults to sit on, perfectly level. A sloped tank stresses the glass seams and looks wrong forever; a cheap foam levelling mat under the tank evens out minor imperfections.
Place the tank away from direct sunlight, which overheats small volumes and grows algae on the glass you cannot dim. Keep it near a power outlet (you will need several sockets: light, filter, heater, timer) and somewhere you can reach with a bucket or hose for water changes. If water changes are a chore, they stop happening, and the tank notices before you do.
Step 3: Add the substrate
Substrate is the tank's soil, and it does three jobs: it anchors roots, stores nutrients where root-feeding plants can reach them, and gives beneficial bacteria an enormous surface to live on. You have two beginner-friendly families to choose from:
- Nutrient-rich aquasoil (the dark, round-grain soils sold for planted tanks) comes pre-loaded with nutrients and softens the water slightly. It is the easiest route to lush root-feeders, but it is also the most expensive, and many brands release ammonia for the first few weeks, which matters for cycling (see Step 9).
- Inert gravel or sand contains no food at all and lasts forever. Plants feed through fertiliser you add as root tabs pushed into the bed and liquid fertiliser in the water. Slower, cheaper, and completely predictable.
Aim for about 2-3 inches (5-7.5 cm) of depth at the front, sloping up to 3-4 inches (7.5-10 cm) at the back. The slope is not just cosmetic: it creates a sense of depth and gives background plants the deep bed their roots want. Rinse inert gravel until the water runs mostly clear. Do not rinse aquasoil; you would wash the nutrients out and turn it to mush. Retaining walls of hardscape or a line of stones keep the slope from levelling itself over time.
Step 4: Build the hardscape while the tank is dry
Rocks and driftwood are the bones of the layout, and dry-scaping is your one free chance to arrange them without fighting buoyancy or murky water. Work in this order:
- Set your largest stone or wood piece first, off-centre. A focal point dead in the middle almost always looks staged.
- Add supporting pieces at descending sizes, all leaning or pointing in a consistent direction so the layout reads as one scene, not a rock collection.
- Bury the bases a little into the substrate so pieces sit solidly and the substrate line looks natural.
- Step back, take a phone photo, and live with it for an hour if you can. Layouts you hate on day one are layouts you re-scape on day thirty, with plants and livestock in the way.
Soak new driftwood or weigh it down; many pieces float for days to weeks. Boiling (if the piece fits a pot) speeds up sinking and reduces the tannins that tint the water tea-brown. Tannins are harmless and many fish like them, but know they are coming. Glue or wedge small pieces together rather than balancing them: a falling rock scratches glass and crushes plants.
Step 5: Install the filter and heater
The filter: flow and a home for bacteria
For planted tanks, look for a filter rated to turn the water over roughly 5-10 times per hour (so a 20-gallon tank wants a rating around 100-200 gallons per hour). Rated flow is measured with an empty filter, so real flow is lower, which is why planted-tank keepers aim above the general aquarium minimum. Flow is not about cleanliness; it delivers CO2 and nutrients to every leaf and prevents the dead corners where algae starts.
Hang-on-back filters suit tanks up to about 20 gallons; small canisters are quieter, hold far more biological media, and keep equipment out of the scape on bigger tanks. Whatever you choose, the biological media (ceramic rings, coarse sponge) is the important part. That is where the bacteria from Step 9 will live. Keep the mechanical sponge too; it protects the bio media from clogging.
The heater: boring, essential
Most beginner plants and tropical livestock are happiest somewhere around 74-78°F (23-26°C), and stability matters more than the exact number. Buy an adjustable heater sized for your tank volume, place it near the filter outflow so warm water circulates, and always pair it with a separate thermometer: heaters fail, and the stick-on strip that came free in the box is not a monitoring system. During the fishless cycle in Step 9 you can run the tank warmer, around 78-82°F (26-28°C), because the bacteria you are growing multiply faster in warm water.
Step 6: Plant in the right order
Fill the tank only a quarter full, or even plant into damp substrate with a spray bottle on hand. Shallow water means plants stay where you put them, you can see what you are doing, and nothing floats away. Mist exposed leaves every few minutes; most aquarium plants are grown above water in nurseries and their leaves wilt quickly in dry air.
Plant back to front so you are never reaching over finished work:
- Background: tall stem plants and large swords at the back, in small bunches of a few stems spaced a finger-width apart, not one tight clump.
- Midground: Cryptocoryne, smaller swords and bushy stems. Push root feeders deep enough that the crown, where leaves emerge, sits right at the substrate surface.
- Foreground: carpet plants in small plugs on a grid, an inch or two apart. They will meet in the middle far faster than one big clump spreads.
- On hardscape: Anubias, Java fern and Bucephalandra are never buried. Their thick rhizome rots underground; instead, wedge or glue them onto wood and rock where the rhizome stays in open water.
Use long planting tweezers, push each plant slightly deeper than its final position, then ease it up a touch as you release: roots point down, and the plant sits snug instead of bobbing up an hour later. Not sure which species fit your light? Run your shortlist through the Plant Finder and start with plants rated easy; you can browse our favourite beginner picks there too. Tissue-culture cups need their gel rinsed off; potted plants need the rock wool teased away from the roots before planting.
Step 7: Fill the tank without wrecking your work
More first layouts are destroyed by the hose than by any later mistake. Place a small plate, a plastic bag, or a colander over the substrate and pour or trickle the water onto that, never straight onto the soil. Fill slowly, especially with aquasoil, which clouds if you blast it. Some cloudiness in the first day or two is normal regardless; the filter clears it.
Add a dechlorinator dosed for the full tank volume before or as you fill, because chlorine and chloramine in tap water are there specifically to kill bacteria, and you are about to spend weeks growing bacteria. Start the filter and heater once the water covers their minimum levels, and check every hose joint and the filter seal for drips now, not at 2 a.m.
Step 8: Set the light for week one
Put the light on a timer from day one and start at about 6 hours a day. New plants spend their first one to three weeks converting their nursery-grown leaves to underwater form and barely feed; algae, meanwhile, is ready immediately. A short day starves algae during the exact window when your plants cannot out-compete it. As the tank settles and plants are visibly growing, stretch the day gradually toward 7-8 hours, which is plenty for most beginner setups.
Consistency beats intensity. A modest light run for the same 6-8 hours daily grows healthier plants than a powerful light you keep fiddling with. If your fixture dims, starting around half to two-thirds intensity for the first weeks gives you the same margin of safety.
Step 9: Cycle the tank (nothing goes in yet)
A new filter is a sterile box. Cycling means growing the bacteria that convert toxic ammonia from fish waste into nitrite, then into far safer nitrate, and it takes roughly 3-6 weeks in most setups. Plants help, and planted tanks often "silently" cycle because plants absorb ammonia directly, but they do not make the tank safe on day one. Our nitrogen cycle guide walks through the fishless method, the test-kit readings to expect and the 24-hour test that proves you are done.
Two planted-tank specifics matter here. First, many aquasoils release ammonia as they settle, which actually feeds the cycle but means the water is genuinely toxic early on, so livestock still waits. Second, expect some plant melt during these weeks as nursery leaves convert; that is normal and is covered in the cycle guide. Feed the cycle a measured ammonia source rather than guessing with fish food, test every day or two, and resist the urge to deep-clean anything.
Your first month, week by week
| When | What to do | What to expect |
|---|---|---|
| Week 1 | Lights 6 h/day; run everything; test ammonia every couple of days; water changes 25-50% a couple of times this week if you used nutrient-rich aquasoil | Slight cloudiness, driftwood fuzz or slime (harmless), first signs of melt on some plants |
| Week 2 | Keep testing; top up evaporation with dechlorinated water; remove obviously dead leaves | Ammonia falling, nitrite appearing in non-planted readings; new roots and small new leaves |
| Week 3 | Stretch light toward 7 hours if algae is quiet; start a gentle liquid fertiliser routine if plants pale | Diatoms (brown dusting) are common now and temporary; stem plants visibly growing |
| Week 4+ | Run the 24-hour ammonia test from the cycle guide; if it passes two days running, do a large water change and stock gradually | A stable, planted tank that is ready for its first, small group of livestock |
Notice what is not on this schedule: rescuing, re-scaping, or buying solutions. The first month of a planted tank mostly asks you to watch, test and trim dead leaves. Boredom in month one is the sound of a setup done right.
Common beginner mistakes
- Blasting the light. Ten-plus hours from day one is the single most reliable way to grow an algae farm with plants in it.
- Burying rhizome plants. Anubias and Java fern planted in substrate rot from the rhizome up. Onto wood and rock they go.
- Adding livestock in week one. The water can look crystal clear and still carry ammonia. Only a test kit knows.
- Deep-cleaning the filter during cycling. Squeezing media under untreated tap water or swapping it "because it looks dirty" throws away the bacteria you spent weeks growing.
- Chasing perfect parameters daily. Constant adjusting swings the water more than the problem would have. Test, log, change one thing at a time.
- Overplanting the shopping list and underplanting the tank. Ten species with two stems each grows worse than four species planted densely. Algae exploits bare substrate; plants are your first algae control.
- Skipping the timer and the dechlorinator. The two cheapest items in the setup prevent the two most common disasters.
Get these right and your first tank stops being a gamble. Set it up in this order, give the cycle its weeks, and by the time livestock goes in you will already have the one thing no product sells: a tank that is boring in all the right ways.