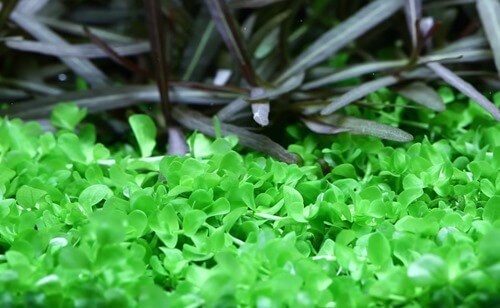
There is a special kind of defeat in planting the same stem five times while it bobs back to the surface five times. Almost every beginner has been there.
Plants don't float up because of bad luck. They float because of fixable mistakes — wrong depth, wrong method for the plant type, or too-shallow substrate. Learn which type of plant you're holding and how that type wants to be planted, and floating plants become rare instead of routine.
Why your plants keep floating up
Before the fixes, let's name the culprits — floating plants are almost always one of these:
- Planted too shallow. A stem pressed half an inch into the substrate has nothing gripping it — that's why stems want a good 1–2 inches of buried depth.
- Substrate itself is too shallow. A one-inch bed gives even well-planted stems nothing to grip. Aim for 2–3 inches of depth (more in the back) — see our substrate guide.
- Wrong method for the plant type. Pushing Anubias into gravel buries the rhizome and slowly kills it. Different families have different rules — the table below is your reference.
- Roots never truly in the substrate. Planting a full tank with your hands is clumsy — the plant goes in crooked and floats back up. The drained-tank + tweezers method below solves this.
- Fish or flow pulls them loose. Freshly planted stems are vulnerable for a few days until roots take hold; strong outflow or digging fish can undo your work overnight.
The four plant families — know which type yours is
Every beginner plant belongs to one of these families. Each gets planted completely differently — which is exactly why "just stick it in the gravel" fails:
| Family | Examples | How to plant | The rule that matters |
|---|---|---|---|
| Stem plants | Rotala, Ludwigia, Hygrophila, Bacopa | Push each stem 1–2 inches deep, spaced apart | Buried bottom nodes grow roots |
| Rosette / crown plants | Amazon sword, Cryptocoryne, Vallisneria | Spread roots, bury them, crown at surface | Never bury the crown — it rots |
| Rhizome plants | Anubias, Java fern, Bucephalandra | Attach to wood or rock, not substrate | Never bury the rhizome — it rots |
| Carpeting plants | Monte Carlo, dwarf hairgrass, Marsilea | Small tufts in a grid, 1–2 inches apart | One tuft doesn't become a carpet |
| Floaters (bonus) | Frogbit, duckweed, salvinia | Don't plant — set them on the surface | Leaves above water, roots hanging |
If you only remember one sentence: check the family before you plant. Two similar-looking plants can have opposite rules.
Unboxing new plants: the prep everyone skips
Plants arrive potted in rock wool, wrapped in gel (tissue culture), or as bare-root bunches with rubber bands and weights. Planting them as-is sets you up for failure — five minutes of prep fixes that:
- Remove the pot and rock wool. Soak the root ball in tank water and gently tease the wool apart — left on the roots, it blocks them from spreading.
- Rinse gel-culture cups thoroughly. The lab gel fouls tank water and feeds algae. Rinse under running water until it's gone.
- Take off rubber bands and weights. Bands strangle growing stems; weights were only for the shop tank.
- Trim damaged leaves and long roots. Snip mushy or melting leaves, and cut roots longer than a few inches back to about 2 — trimmed roots regrow vigorously within days, while long tangled roots rot.
- Keep plants wet while you work. Drape a damp towel over the pile — roots exposed to air for 20 minutes can dry out and die back.
Tools that make planting ten times easier
- Long aquascaping tweezers (10–12 inches). The single most transformative tool in this hobby — place a stem exactly once instead of chasing it. Fingers work for one plant; tweezers work for sixty.
- Curved aquascaping scissors. For trimming and dividing carpeting pots into tufts. Cheap stainless kits work exactly the same as branded ones.
- A siphon hose + spray bottle. You'll drain the tank down before planting, and mist exposed areas as you work.
Step-by-step: planting the whole tank
- Drain the tank to about one-third full. No buoyancy fighting you, no cloudiness, and you can see exactly what you're doing. Mist exposed areas as you go.
- Work back to front, tall to short. Background stems first, then midground rosettes, then foreground carpets last — so you never reach over a freshly planted area.
- Use the tweezer method for every rooted plant. Grip the plant a little above its base, push it straight down to the target depth, then wiggle slightly and pull the tweezers straight up — the wiggle lets substrate fall back around the roots and lock the plant in.
- Firm the substrate around each plant. Just close the little crater the tweezers left — don't compact it.
- Plant stems individually, with space. A whole bunch in one hole rots from the inside out. Space stems roughly 1 inch apart.
- Refill slowly — pour over a plate or your hand to avoid blasting your fresh planting.
- Dim the lights for the first week. Around 6 hours a day while roots establish. Our lighting guide explains why starting short prevents the day-one algae bloom.
How to plant each type correctly
Stem plants (Rotala, Ludwigia, Hygrophila)
Strip the lowest 1–2 inches of leaves (they'd rot buried), then push each stem 1–2 inches deep with the tweezer method. It looks bare at first — that's normal. Within a week or two, buried nodes send out white roots and anchor the plant permanently.
Rosette / crown plants (Amazon sword, Cryptocoryne, Vallisneria)
Spread the roots out like fingers instead of balling them up, then bury the roots fully while keeping the crown — the point where leaves meet roots — right at or just above the substrate surface. Buried crowns rot and the whole plant dies.
Rosettes are heavy root feeders: push a root tab 2–3 inches deep into the substrate, about an inch away from the plant base — never directly against the roots, since concentrated fertilizer can burn them. Replace the tab every 3–4 months.
Rhizome plants (Anubias, Java fern, Bucephalandra)
These never go in the substrate — a buried rhizome rots within weeks. Your options: glue it (dab cyanoacrylate gel on the rhizome, press onto driftwood or rock for 30 seconds — fish-safe once cured), tie it (cotton thread rots away in weeks, by which time the plant's own roots have gripped on), or wedge it into a crack. Rhizome plants feed mostly from the water column, so pair them with a light liquid fertilizer rather than root tabs.
Carpeting plants (Monte Carlo, dwarf hairgrass)
Divide the pot or tissue cup into small, dime-sized tufts and plant them in a grid, roughly 1–2 inches apart. It looks ridiculously sparse at first — that's the point. More planting points means the carpet fills in weeks instead of months. Leave carpets completely alone for the first week.
Floating plants (frogbit, salvinia, duckweed)
Just set them on the water surface — roots hang down, leaves stay dry on top. Keep them away from strong filter outflow (a floating ring of airline tubing works as a corral) and thin them out regularly — they double fast and can shade out everything below.